
How to issue a purchase order
- Open Requests from the sidebar and click the approved request you want to process.
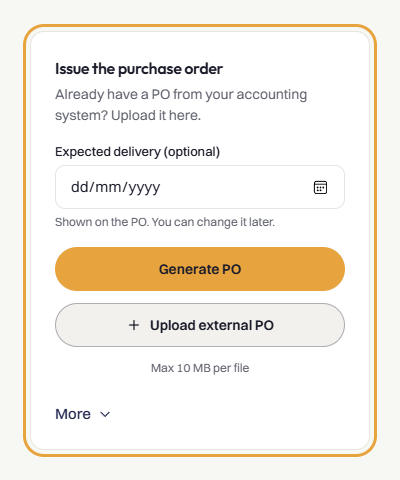
- In the right-hand panel under Issue the purchase order, check the expected delivery date or choose a date in Expected delivery (optional).
- To generate a standard purchase order PDF within Bilaro, click Generate PO.
- To attach a purchase order from an external accounting system instead, click Upload external PO and select your PDF file.
- The request status updates to PO issued, and the purchase order PDF is available under Documents.
Note: By default, company settings enforce the four-eyes principle. If you approved the purchase request as a manager or director, Bilaro prevents you from issuing the purchase order. Another user with the Finance or Admin role must issue it. If an admin disables the four-eyes setting in Company Settings, you can issue the PO yourself, and Bilaro records an audit note stating that four-eyes was turned off by company setting.
How to view payments waiting
- Open To do from the sidebar.
- The Pay section lists purchase orders and direct payments waiting for payment, along with the balance due.
- The Issue PO section lists approved requests waiting for a purchase order to be issued.
- Click Record payment on a payment row, or Issue PO on an approved request row, to open the request and carry out the action.
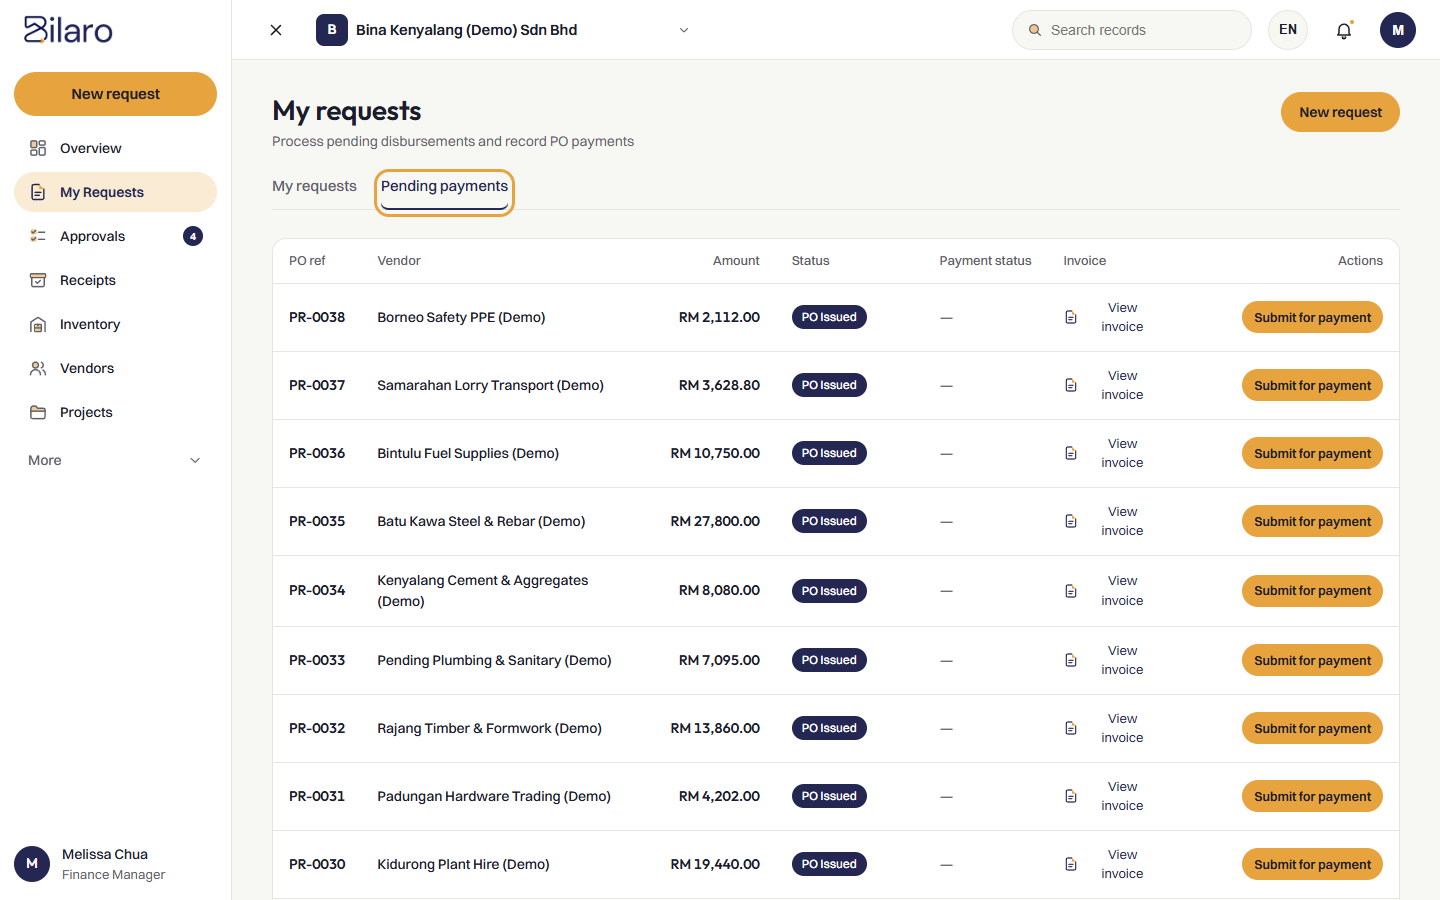
Tip: You can also navigate to /payment-request to submit an invoice and request disbursement for an issued purchase order.
How to record a payment
- Open the request from Requests or from To do (under Pay).
- In the decision panel on the right, click Record payment.
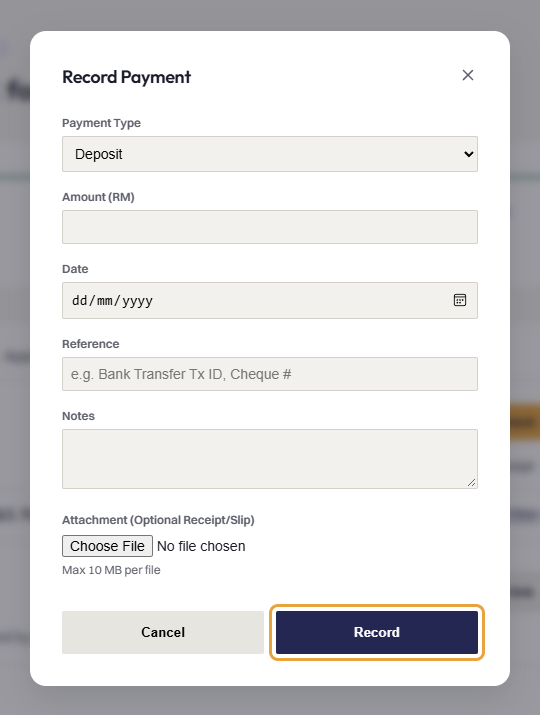
- Select the payment stage from the Payment Type dropdown: Deposit, Progress payment, or Final payment.
- Enter the amount paid in Amount (RM).
- Select the payment date in Date.
- Enter the transaction identifier (such as a bank transfer reference or cheque number) in Payment Reference.
- Enter any optional remarks in Notes.
- Under Attachment, click the file input to upload a payment voucher or bank receipt.
- Click Submit to save the payment record.
Note: For direct payment requests, enter the payment amount and reference directly in the Record direct payment form on the decision card, then click Record payment. Tip: When recorded payments reach the total order amount, open Requests, go to the Pending payments tab and click Mark paid to complete the purchase order lifecycle.
How to share a supplier upload link
- Open an issued purchase order on the request details page.
- Scroll down to the Supplier documents section.
- Click Create supplier upload link.
- A modal appears displaying a unique link and its expiry date. Click Copy link.
- Paste and send the link to your supplier by email or messaging.
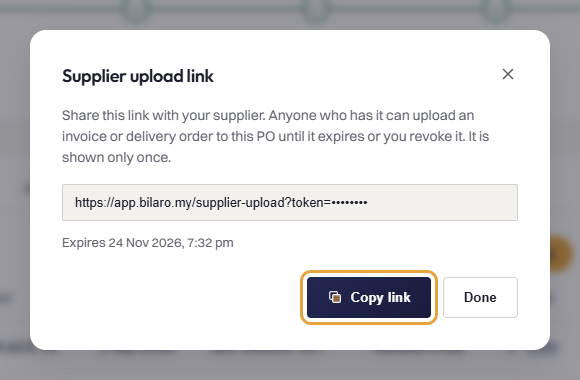
Note: Anyone who has the link can upload an invoice or delivery order to this purchase order without logging in. The link is shown only once upon creation. You can click Revoke in the supplier documents section at any time to disable access.
How suppliers upload documents
- The supplier opens the secure link in any web browser.
- In the Document type selector, the supplier selects either Invoice or Delivery order.
- Under Document file, the supplier selects a file from their computer or mobile device (PDF, JPEG, or PNG up to 10 MB).
- In Supplier name, the supplier confirms or enters their company name.
- In Reference No. (Invoice or DO number), the supplier enters their invoice or delivery order number.
- In Note (optional), the supplier enters any delivery notes or comments.
- The supplier clicks Upload document.
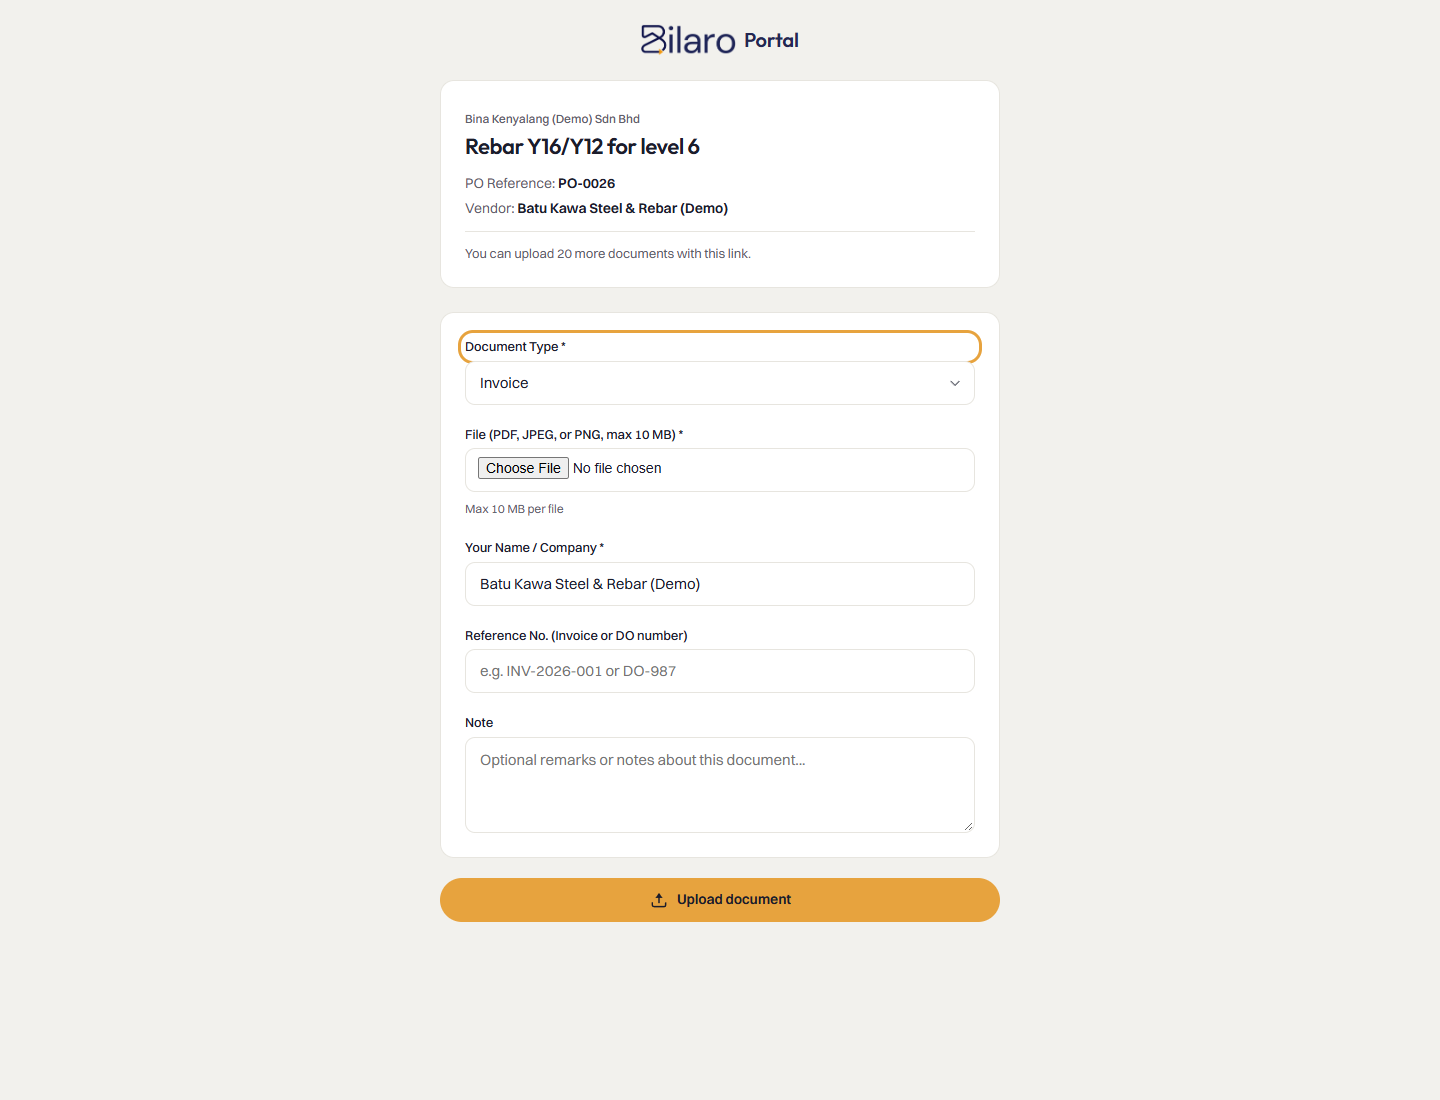
Note: Once uploaded, the document appears immediately under Supplier documents on the request page for your finance and receiving teams.
How to disburse petty cash
- Open Petty Cash from the sidebar.
- Review the list of submitted and approved claims.
- Use the Project and Department dropdowns at the top if you need to filter claims.
- Locate claims marked with the APPROVED status badge.
- Click Disburse on the approved claim.
- The status updates to indicate disbursement is complete, and the payout is deducted from company petty cash allocations.
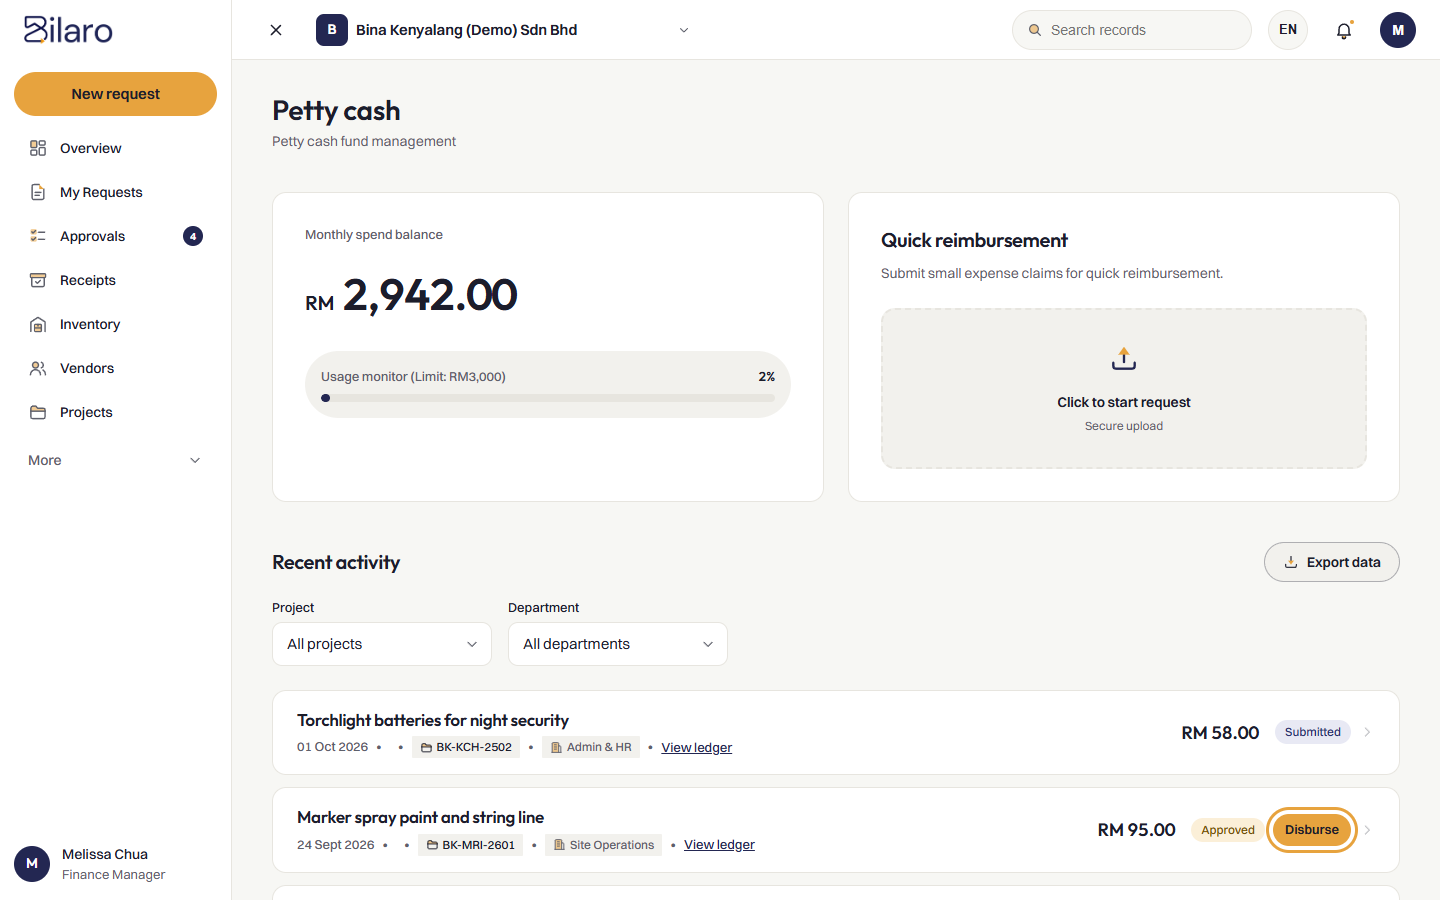
Tip: Click View ledger on any claim row to inspect the attached receipt or transaction slip before releasing funds.
How to monitor budgets
- Open any procurement request from Requests or To do.
- Check the decision panel on the right for budget warnings under the checks heading.
- If an order exceeds the allocated department budget, Bilaro displays a warning banner stating the amount over budget.
- If your company policy is set to Strict, requests exceeding budget limits cannot be approved until an administrator adjusts the budget.
- If your company policy is set to Standard, approvers see the warning banner but can proceed with approval.
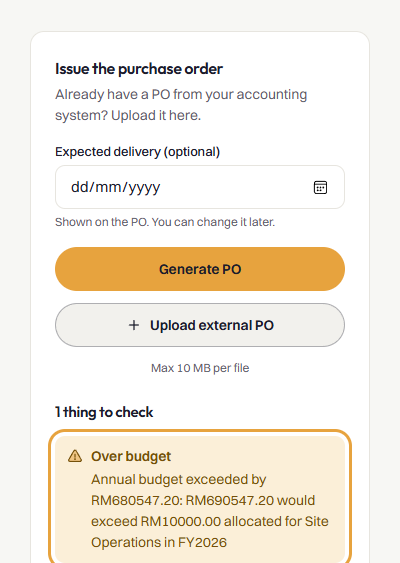
Note: Department budget limits are set by Admins and Global Admins under Budgets in the sidebar.
How to view spend analytics
- Open Analytics from the sidebar (available on the Pro and Trial plans, and on billing-exempt accounts).
- Select a time window using the date filter buttons: All time, This year, This month, Last 6 mo, or Custom.
- Click the Spend by vendor tab to see top suppliers ranked by total volume, order count, and monthly purchasing trends.
- Click the Spend by department tab to see expenditure divided across company departments.
- Click the Direct payment categories tab to review recurring direct disbursements not tied to standard purchase orders.
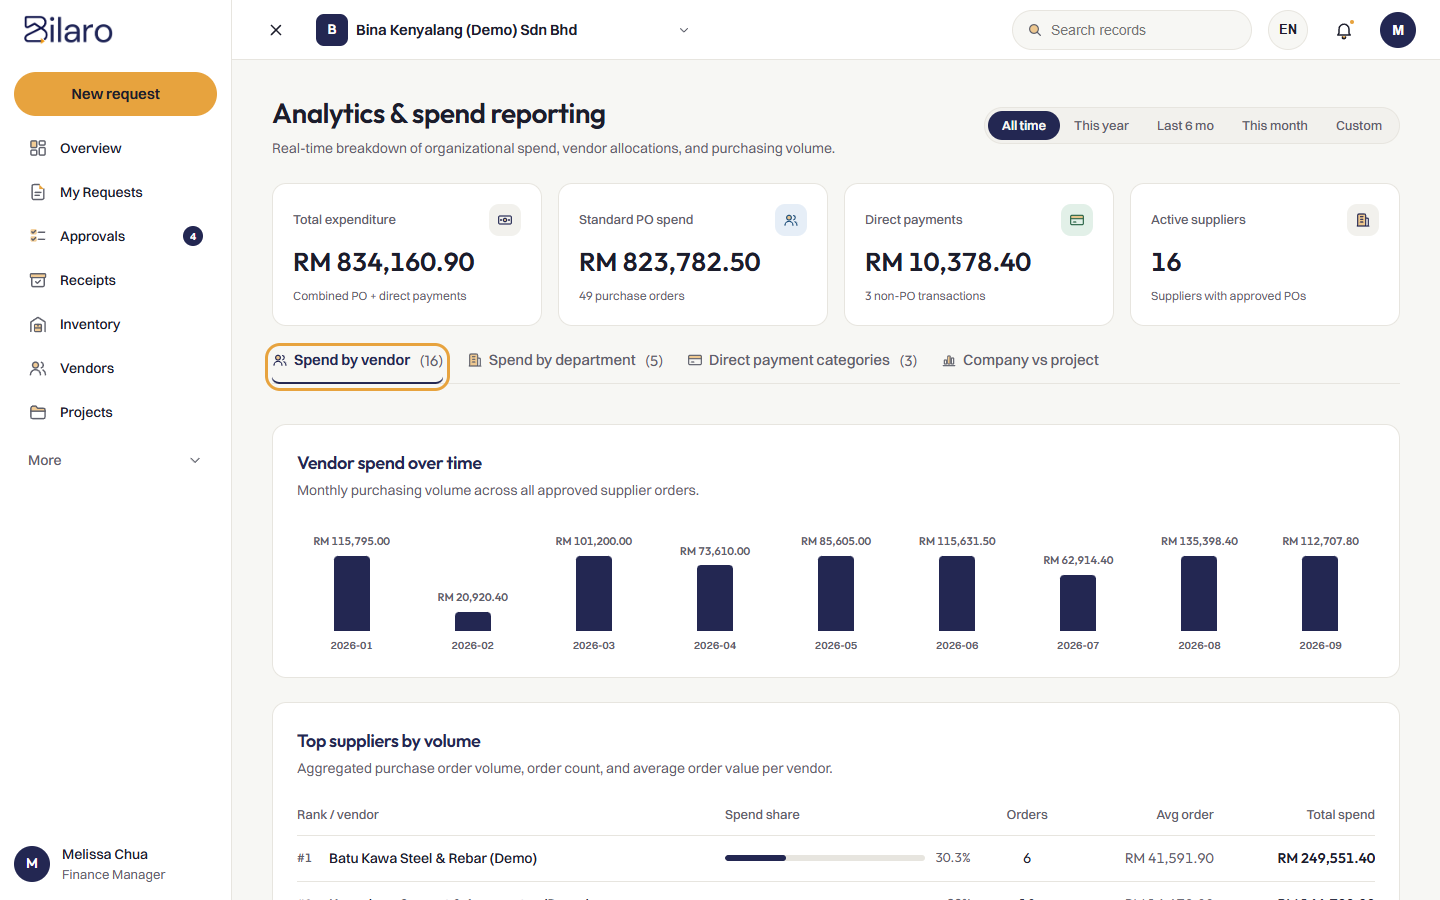
Tip: Hover over any bar in the monthly trend chart to view the exact spend amount and number of purchase orders for that month.
Need more help? Email support@bilaro.my.